Set up workflows
Workflows allow you to enable or disable expense approval settings. If you are tracking your personal expenses, you probably don’t need someone to approve those expenses. But if you are tracking employee expenses, you might want extra approval settings for those expenses.
Workflows are available for Collect and Control workspaces. Additionally, you must be a Workspace Admin to complete this process.
Enable workflows
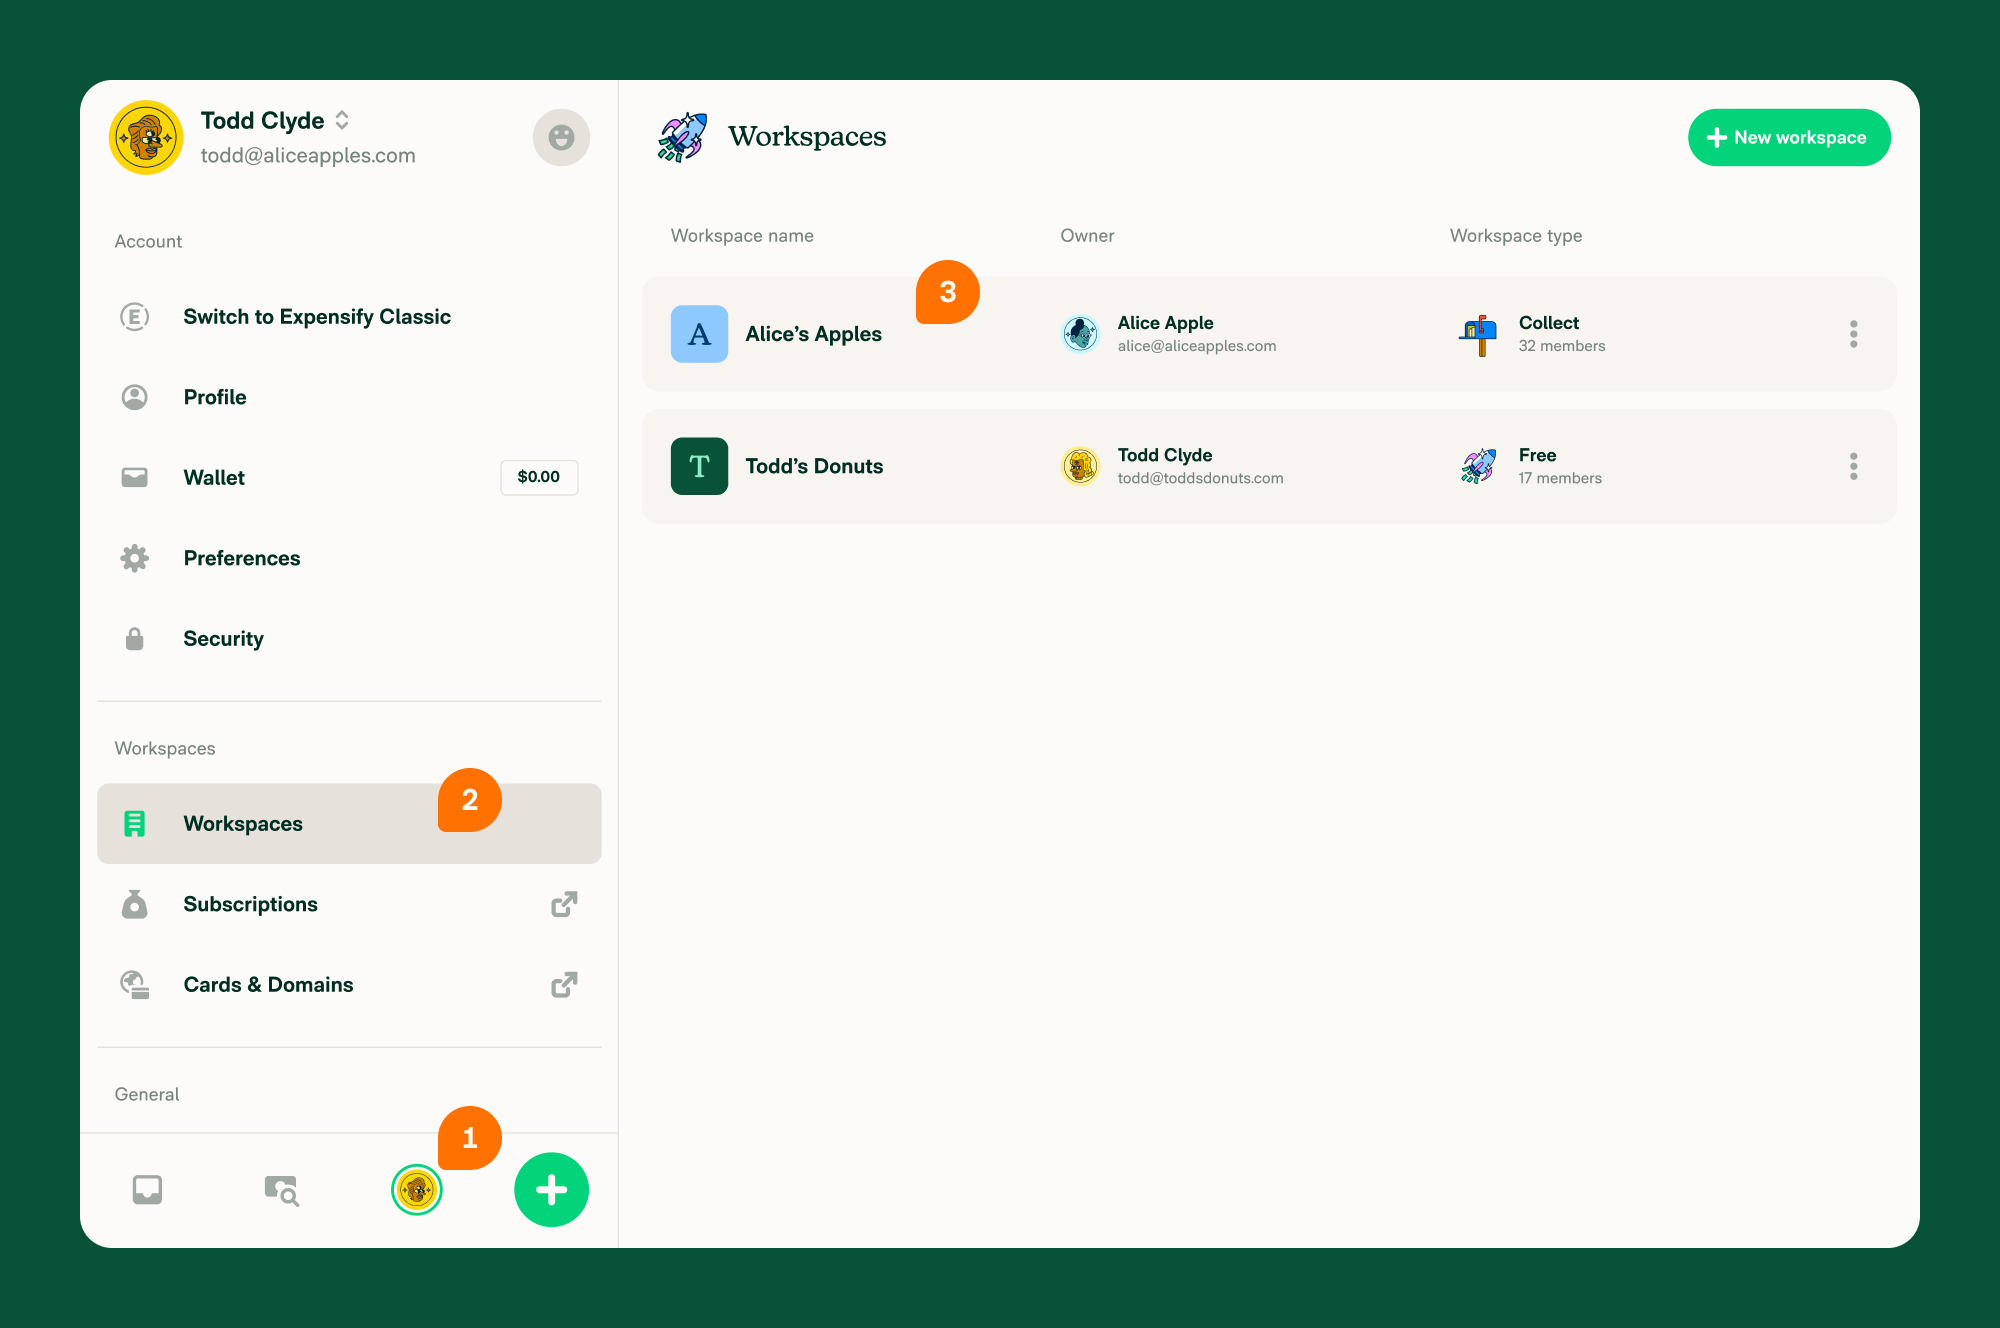
- Click your profile image or icon in the bottom left menu.
- Scroll down and click Workspaces in the left menu.
- Select the workspace you want to enable approval settings for.
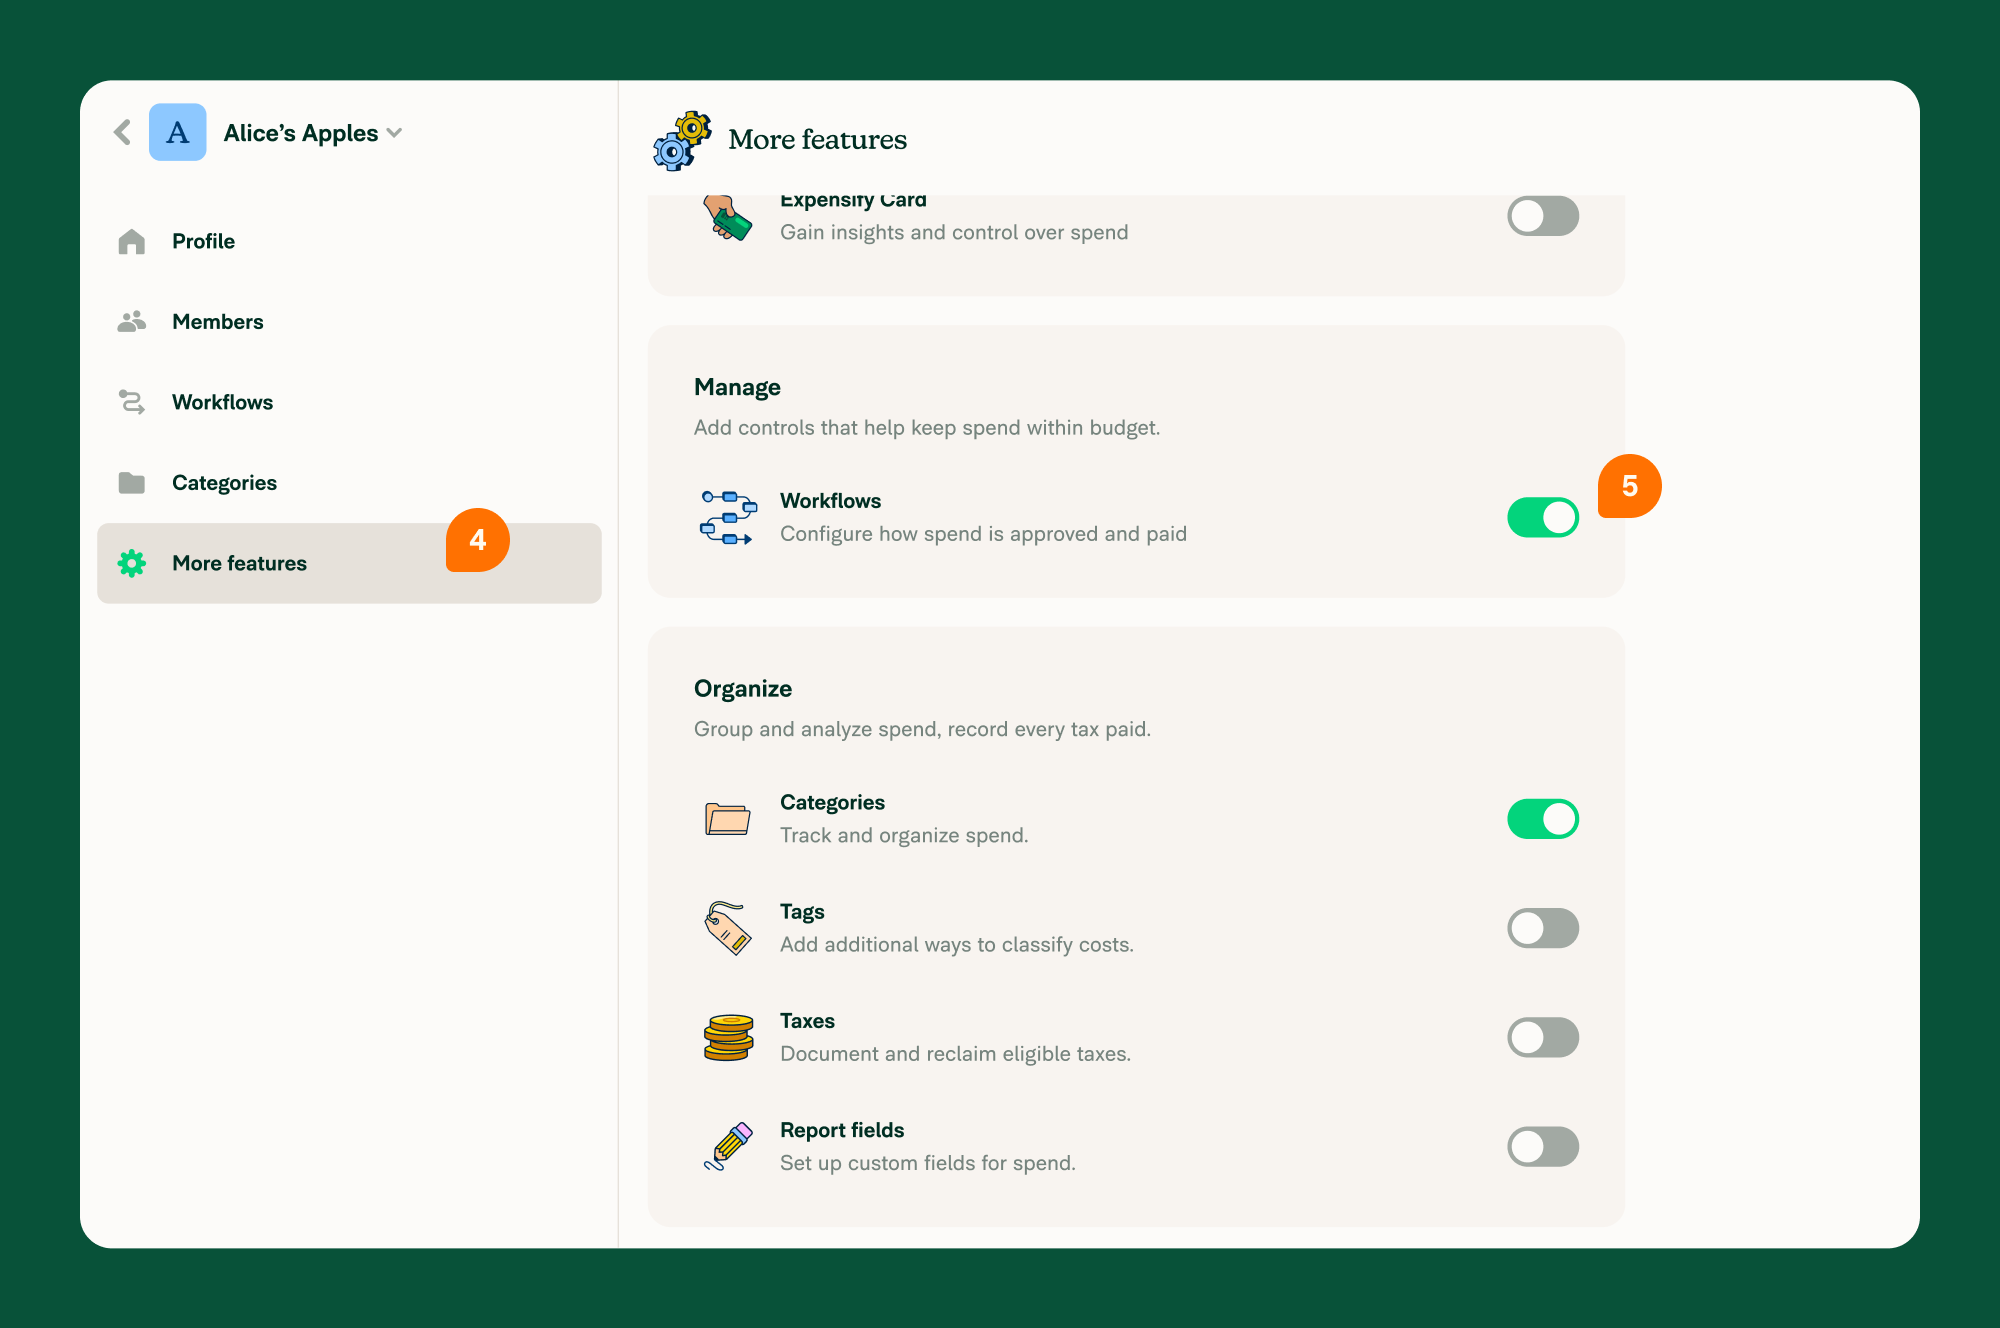
- Click More features in the left menu.
- Under the Spend section, enable the Workflows toggle.


Select workflows
You can choose to require additional approvals and/or allow delayed submissions.
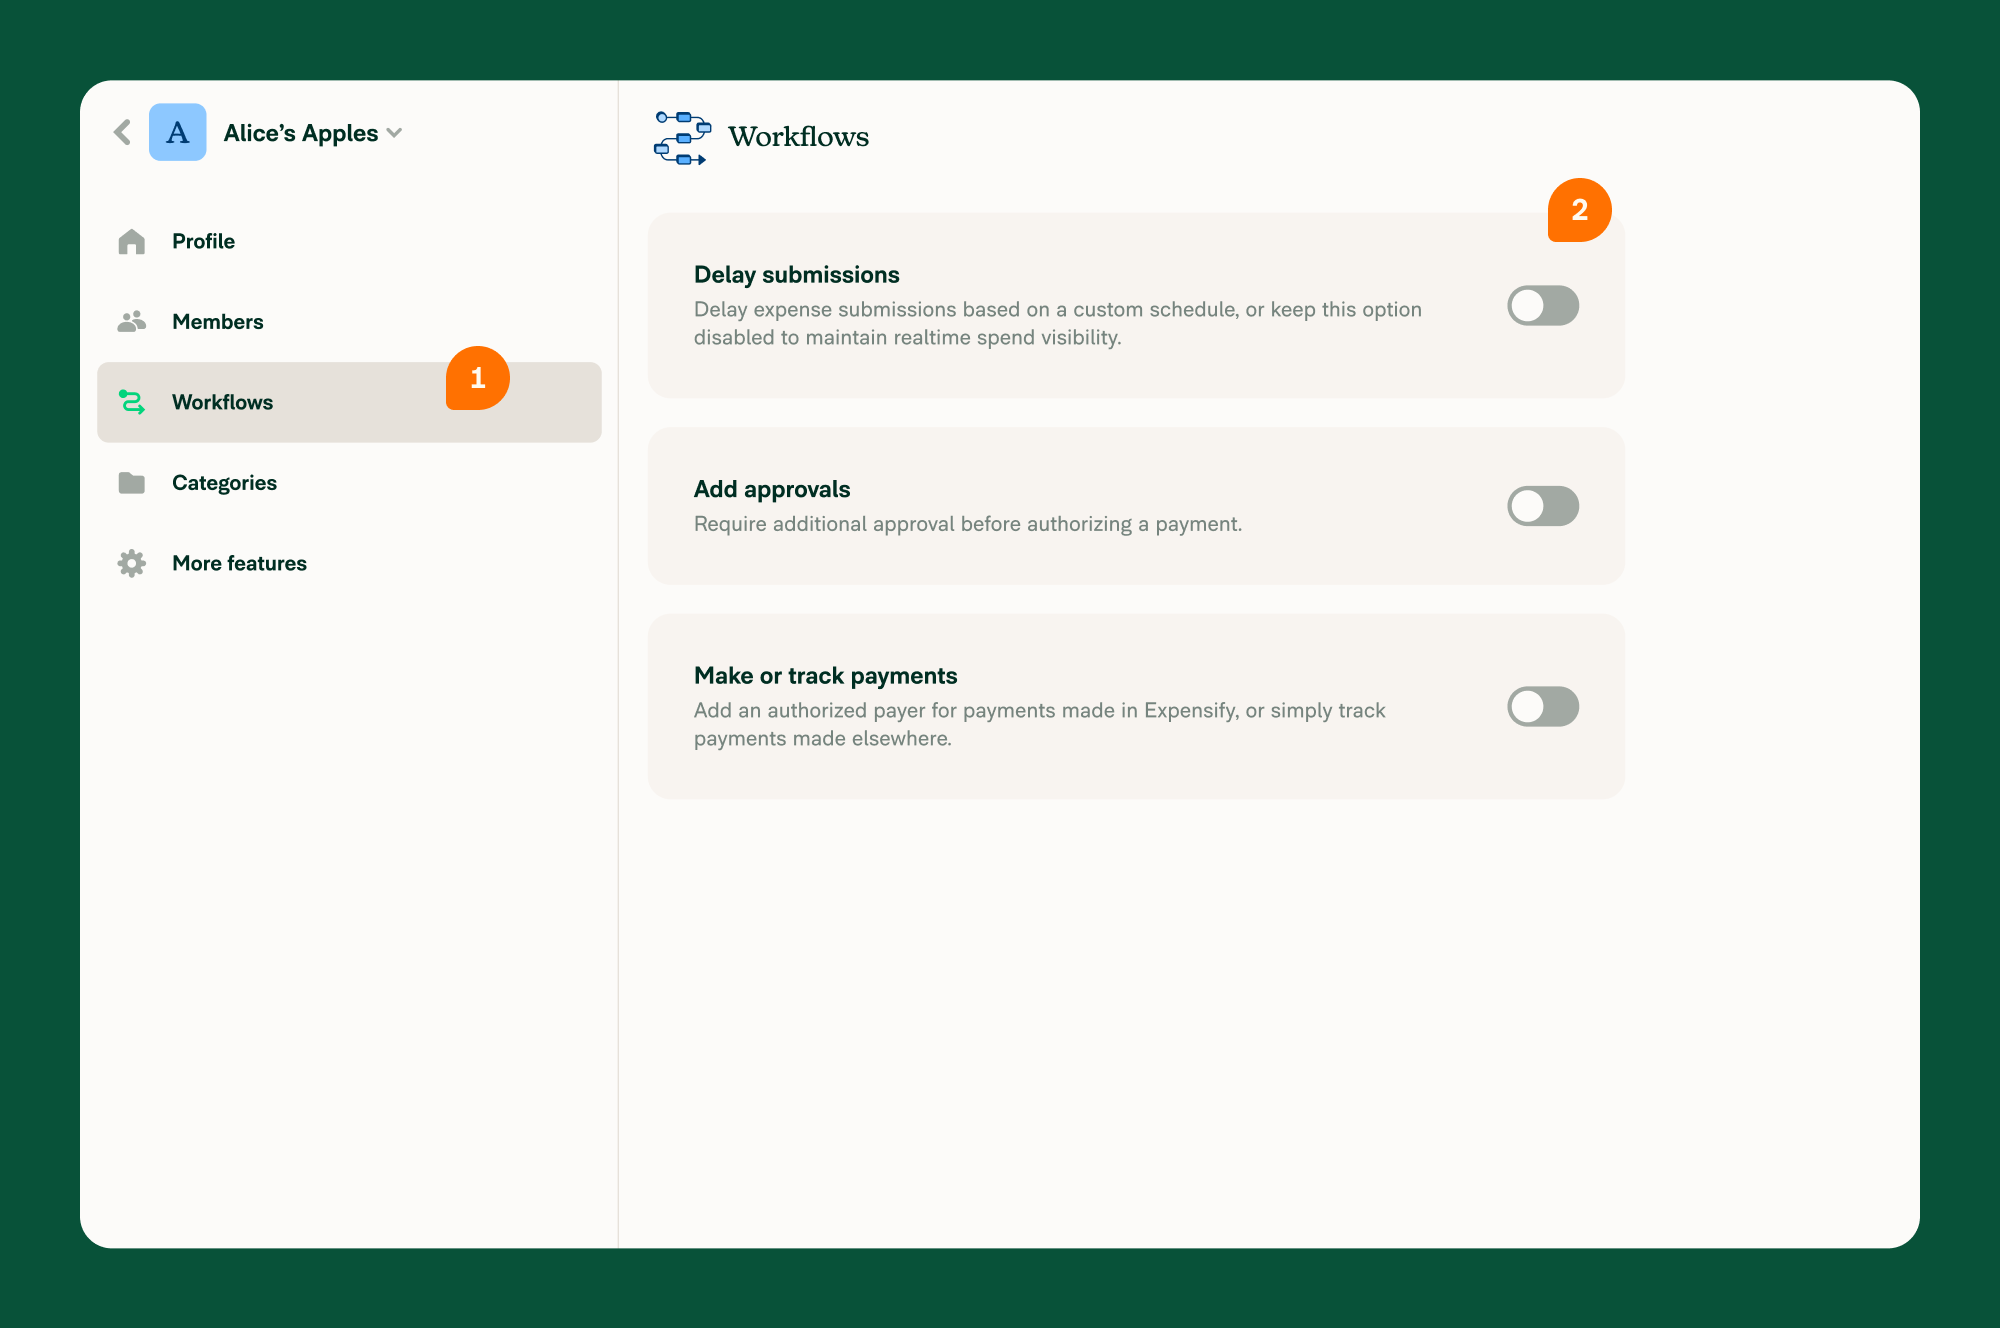
- Click Workflows in the left menu.
- Enable the toggle for the desired workflow setting:
- Add Approvals: Requires additional approval for an expense before a payment can be authorized. Once enabled, click the Approver field to select an approver. This person must be a workspace admin. The default approver is the workspace owner.
- Delay Submissions: Determines when issue-free expenses are automatically submitted. Once enabled, choose a delay frequency: – With delayed submission enabled, all reimbursable and non-reimbursable expenses will be submitted at a designated frequency. – If delay submission is disabled, all reimbursable and non-reimbursable expenses are submitted instantly.

Set up payment account
The payments section is where you’ll set up your business bank account for payments of expenses and invoices.
- Click Workflows.
- Enable the Payments toggle.
- Click Connect Bank Account.
- Follow the prompts to connect your company bank account.
- Once enabled, choose an authorized expense payer. The authorized payer is a workspace admin who has access to the business bank account. They will be the default reimburser/payor for expenses submitted to the workspace.
FAQ
If I have delayed submission and an approver, what should I expect with a report?
When Add Approver is enabled with Delay Submission, expense reports go from Open > Processing > Approved. If delayed submission is disabled, expense reports go from Processing > Approved.


